I’m sure everyone else has heard of “high dynamic range” or HDR photography, but for me, it’s “The Latest Thing” I’ve discovered. You know how you sometimes come across this amazing scene with lights and darks and bright colors, and you snap a photo to preserve it exactly as you saw it, and then you discover later your photo doesn’t really capture the scene as you remember it in your head? Well, HDR photography can fix some of that.
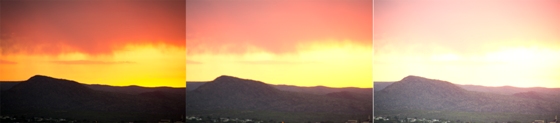
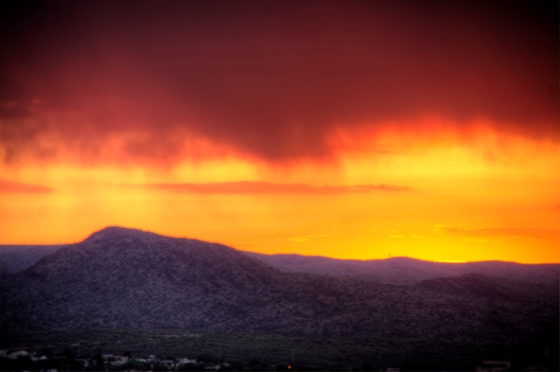
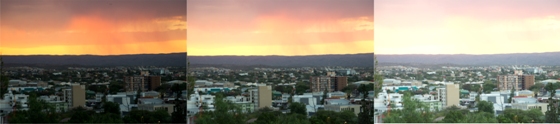
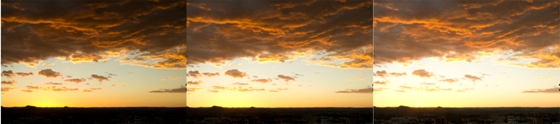
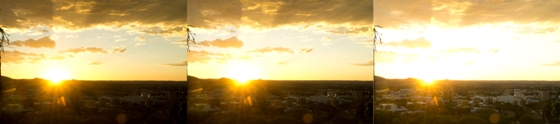
Take this one, for example. First, 3 individual photos I took at different shutter speeds. The one below that is an HDR photo of the same scene.
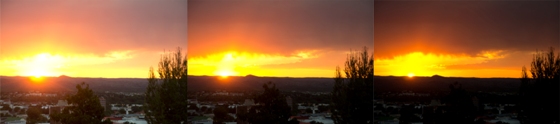
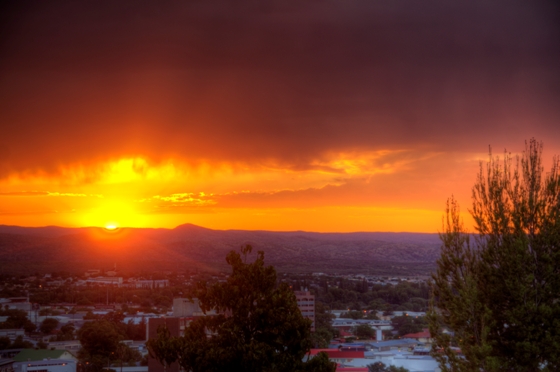
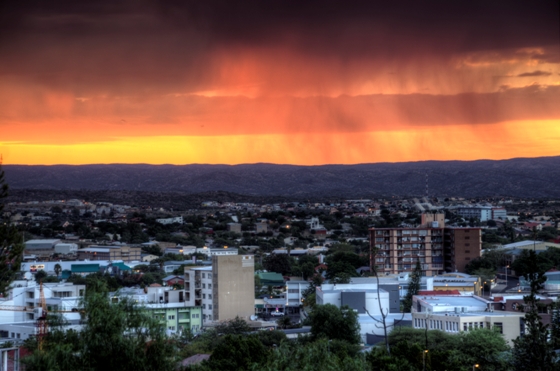
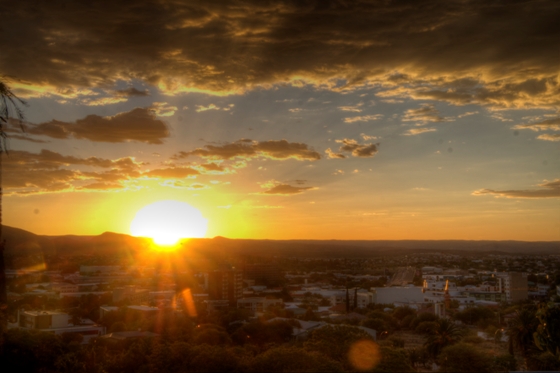
In the 3 non-HDR photos, the camera either captures the sky accurately, while the city below is completely dark; or you can see the city but the sky is much too bright. While you might argue that the HDR photo looks unnatural, I do think it’s a lot closer to what I was seeing with my eyes when I went to snap the photo.
How and why does this happen? When you look at the sunset in real life, your eyes are constantly moving back and forth, with your eyes making rapid adjustments, depending on how much light your eyes need to let in. So you look at the sky, and your irises contract so you can see the clouds; you look down at the city, and your irises open up again so you can make out the details in the buildings. It happens so seamlessly and quickly that you don’t realize it’s happening. But your camera’s eye has to capture the entire scene at once. It has to make a choice – or you can, if you change your settings to manual – but once that single light setting is captured, the result is something your eye no longer needs to adjust to.
In HDR photography, you take multiple exposures. Then you combine all of the different parts of those photos that are exposed correctly into a single image. How?
There’s the slow way. First, you need to stack the individual shots within a program like photoshop. It can be 2, 3 (most common), or more photos. Then, you make sure they are all perfectly aligned – even a tripod and a remote will allow a slight bit of movement. Then you make parts of the “top” photos transparent to allow some of the lower photos to show through, in a process called masking. For example, you’d allow the bright orange sky to peek through the photo where the sky has been overexposed – resulting in an image which combines the “correctly” exposed parts of two photos.
I tried the slow way. I’m thinking that, for the very patient person and with a whole lot of trial and error and practice, this would ultimately result in the best outcome. So I tried the fast way, which I read about at Trey Ratcliff’s website, Stuck in Customs. There, you not only get suggestions on software to use and a 15 percent discount, you also get a tutorial on how to use them.
So how does the process work? Well, first you set up your camera to either take “auto-bracketed” photos, or to take RAW photos. Trey’s site says you want to take at least 3 photos with different exposures – one light, one dark, and one medium. I read a few other sites and decided to play around with shutter speed instead. I set the camera on a tripod, operated a small dial that allows you to change the shutter speed with a minimum of moving and shaking of the camera, then used a remote to snap the photos. Then you take these photos, load them onto your computer, and then load them into the Photomatix program. There are a million settings and presets you can change, and even after you process the photo, it allows you to make additional adjustments. Trey gives you some advice in his tutorial, but it’s best to just play around and experiment.
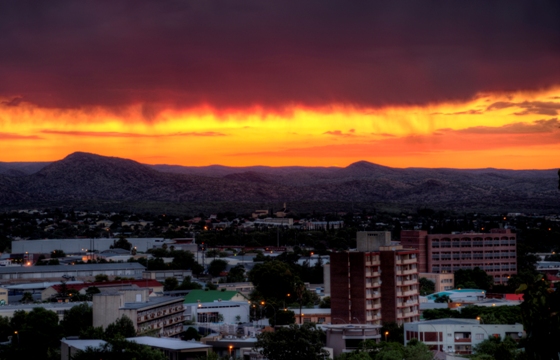
One thing you’ll want to think about is avoiding overdoing the settings so that the scene no longer looks like you saw it, or is realistic anymore. For example, you take a picture of a bright sky over a dark sea – it would look odd if the sea ended up brighter than the sky. And then there is all the cleanup you’ll need to do afterward – dealing with ghosting, chromatic aberration, all those other little problems I don’t really recognize until somebody points them out on all my photos! That will be something for future experimentation. In the meantime, here’s what I came up with – in each case with the bracketed photos preceding. These are all photos taken from my front porch in Windhoek, Namibia. Because I’m lazy that way.