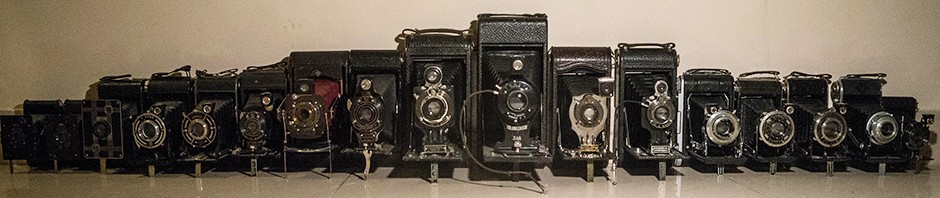
Among the growing group of people who collect and operate vintage film cameras, there are two types of people: those who quickly figure out a way to make an old camera work again, and those who obsess way too long over making an old camera work, to the point that it’s no longer really about the camera. But, by gosh, you’re going to make that camera work.
This is the definition of obsession.
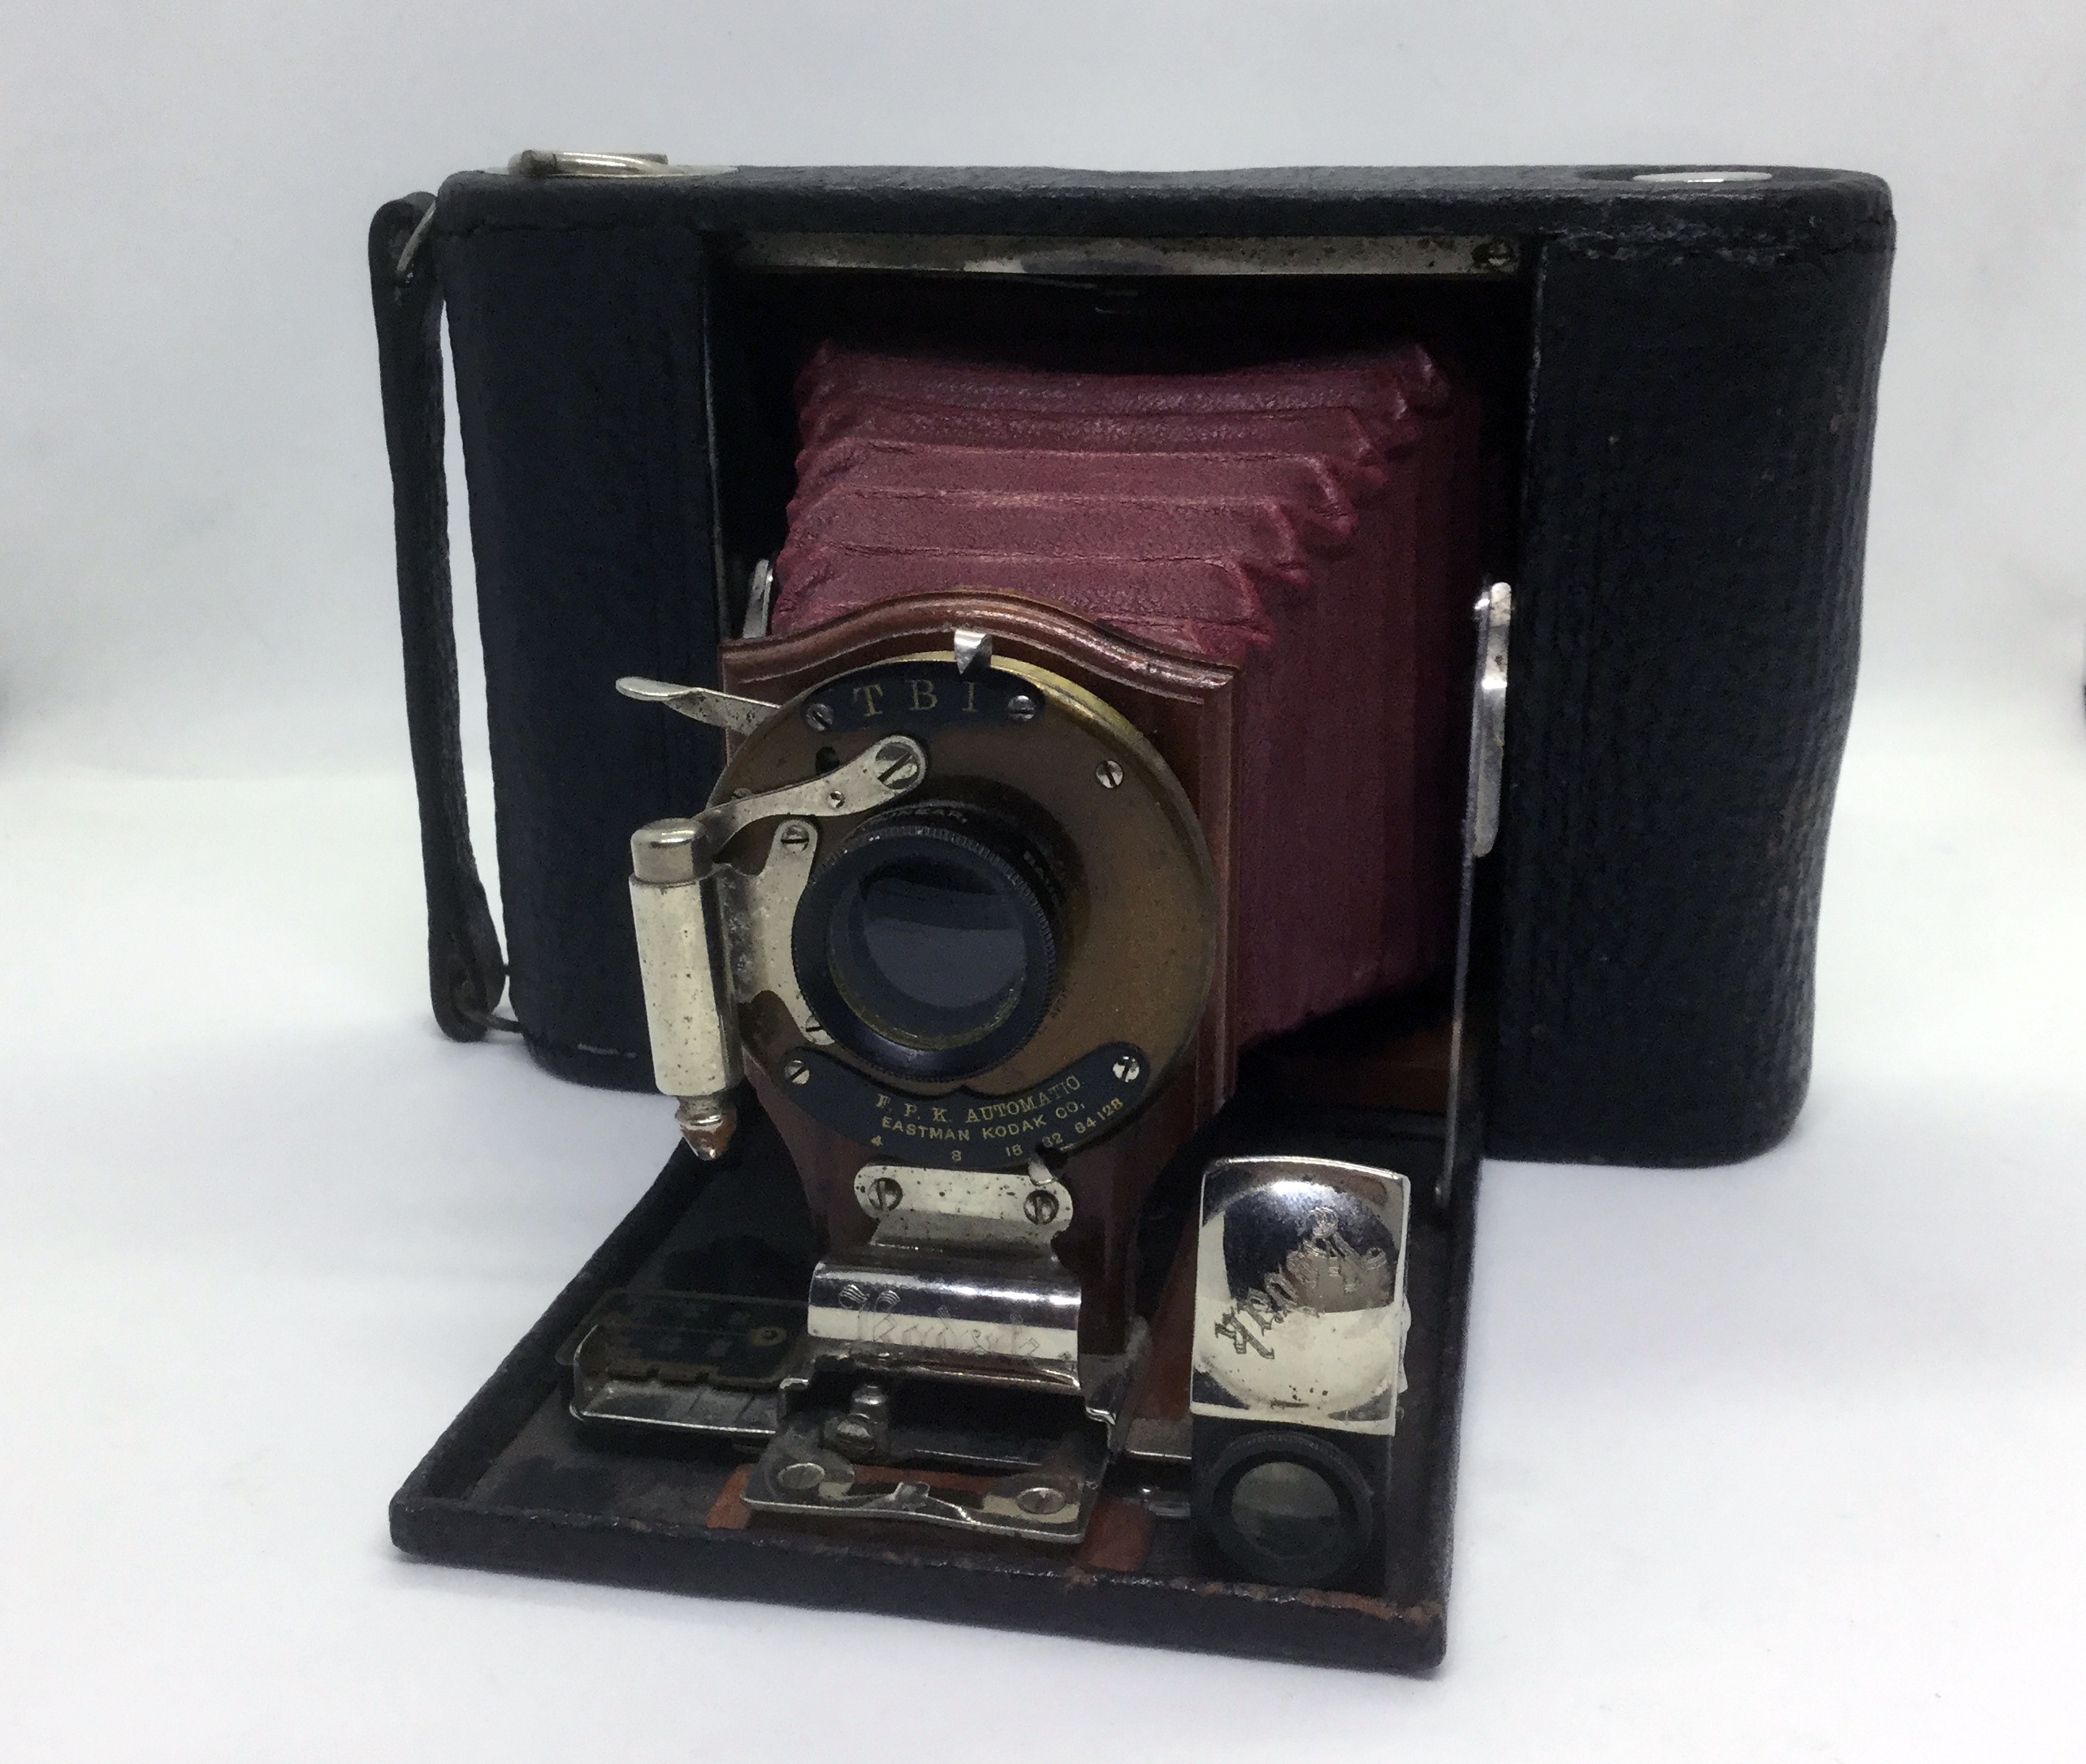
So let’s talk about the No. 2 Folding Pocket Kodak (Model C). Or maybe it’s a (Model D). The inside of the back cover says D, but print under the front rails says (Model C).
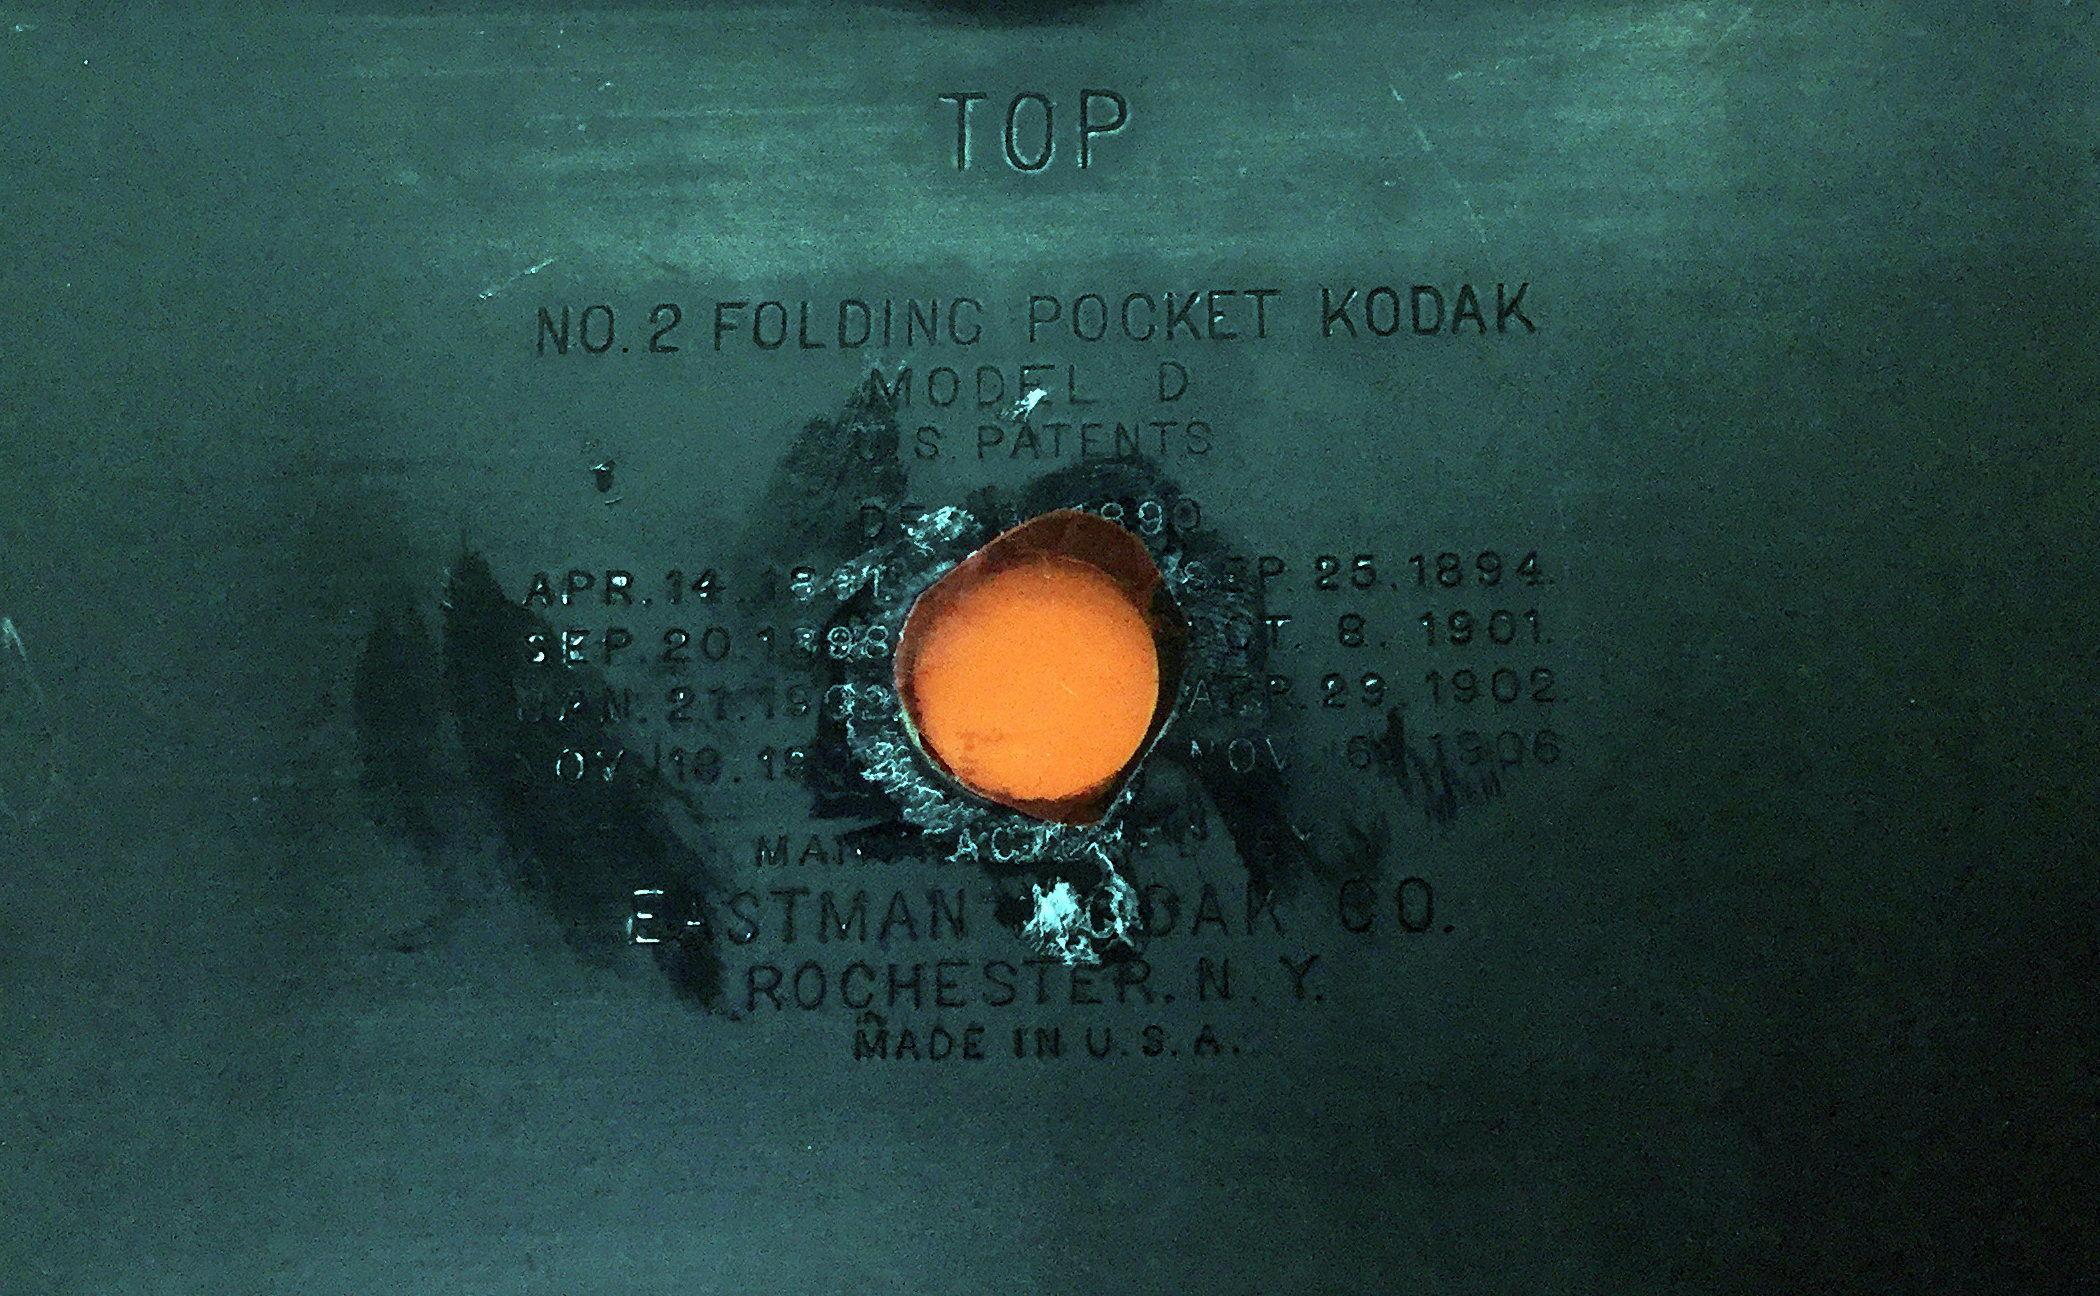
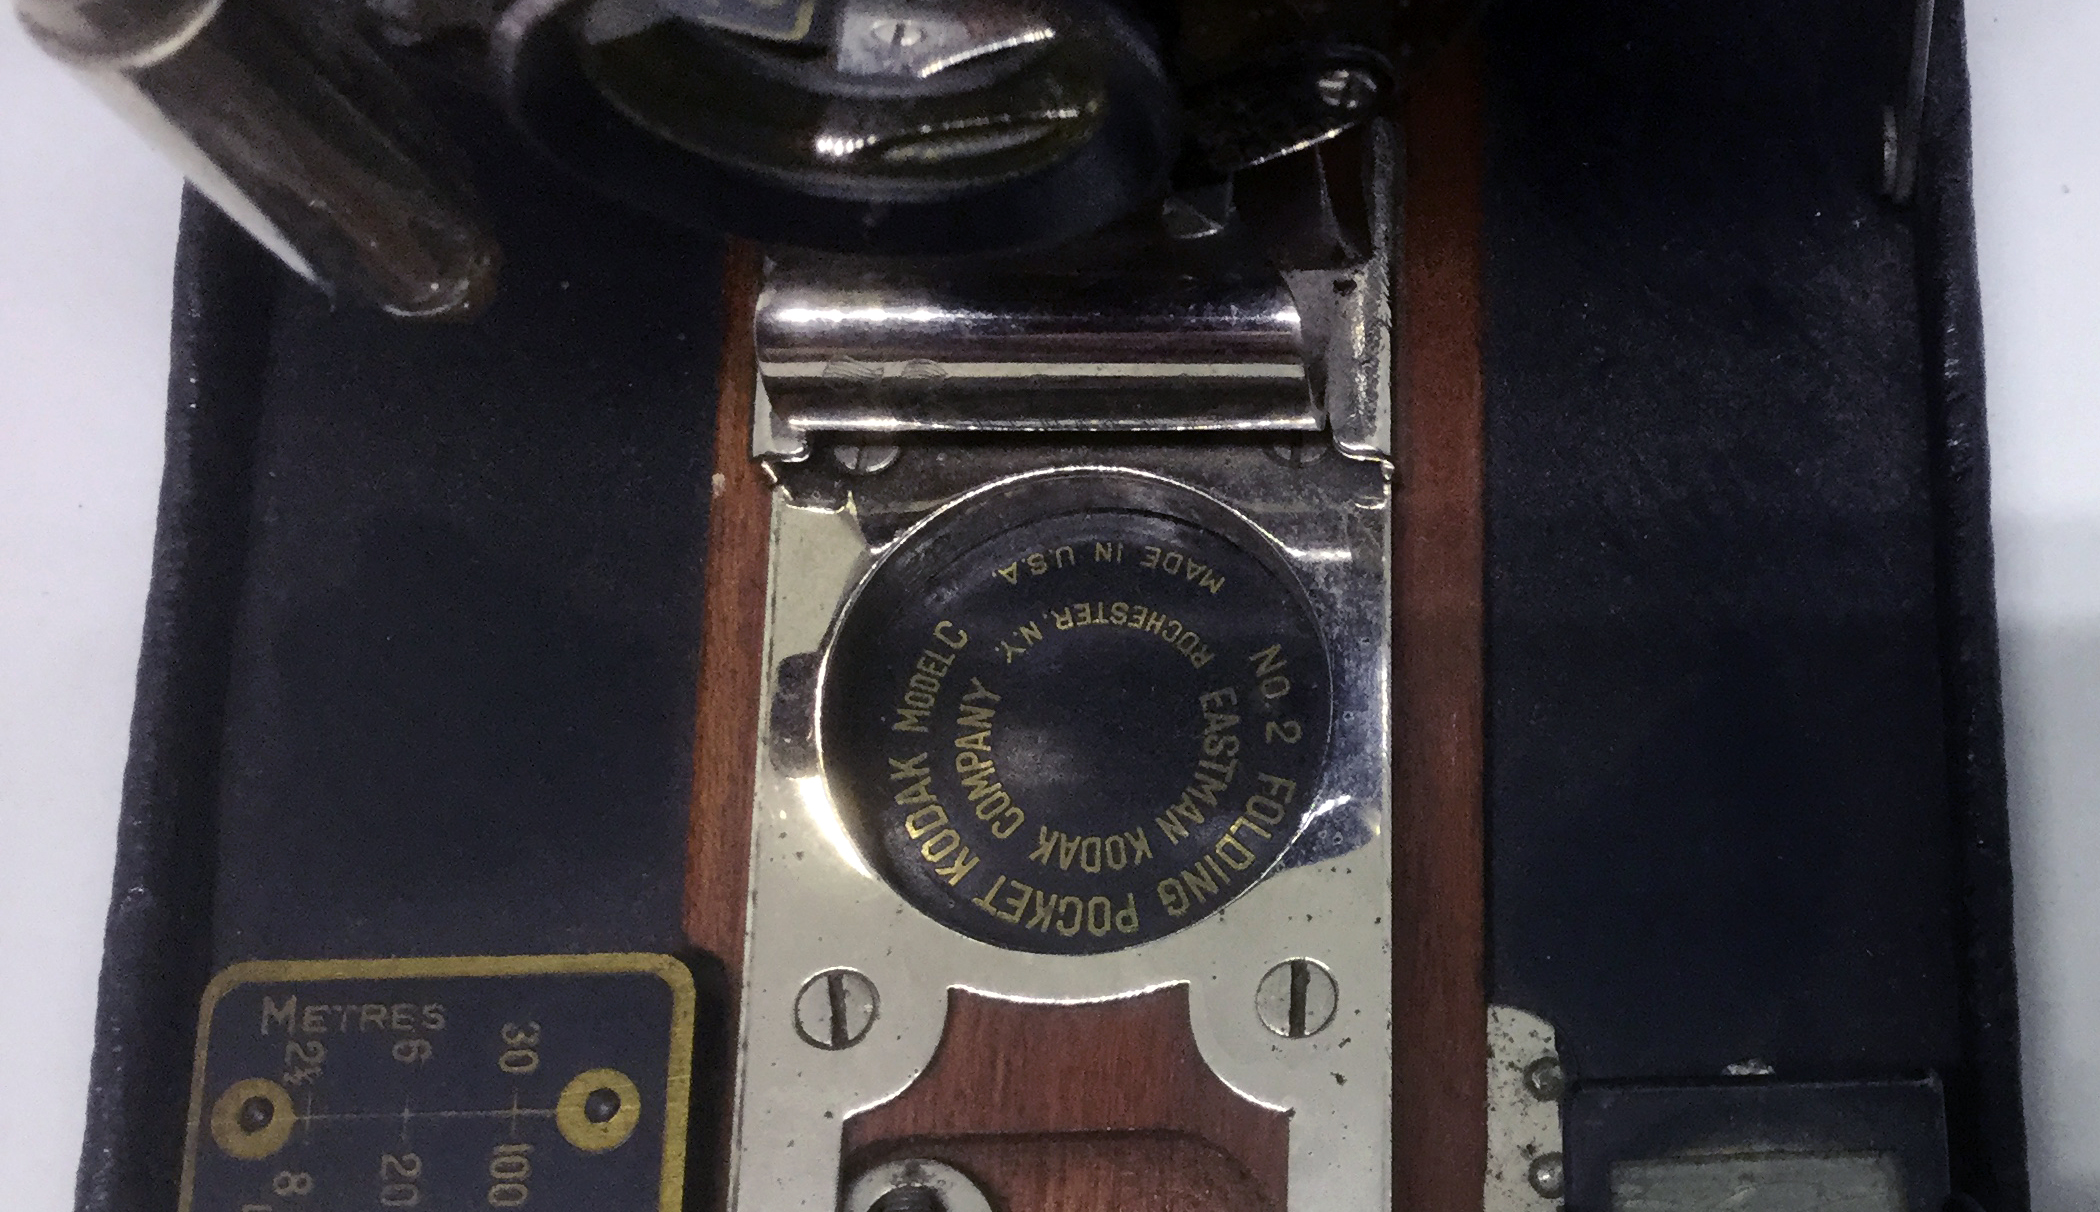
There’s not a whole lot of information on these, other than the No. 2’s were all manufactured between 1899 and 1915, and the bellows went black in 1913. So this one is probabably from 1909 to 1913 or so. It’s a typical folder of that time in that you press a hidden button to open a flap that opens parallel to the long side of the camera, revealing metal rails on a wooden bed that allow you to pull the shutter mechanism consisting of an FPK automatic shutter and a rapid rectilinear lens forward, revealing the beautiful, red bellows. It’s made of aluminum and covered in black leather and allows aperture settings from f/4 to f/128.
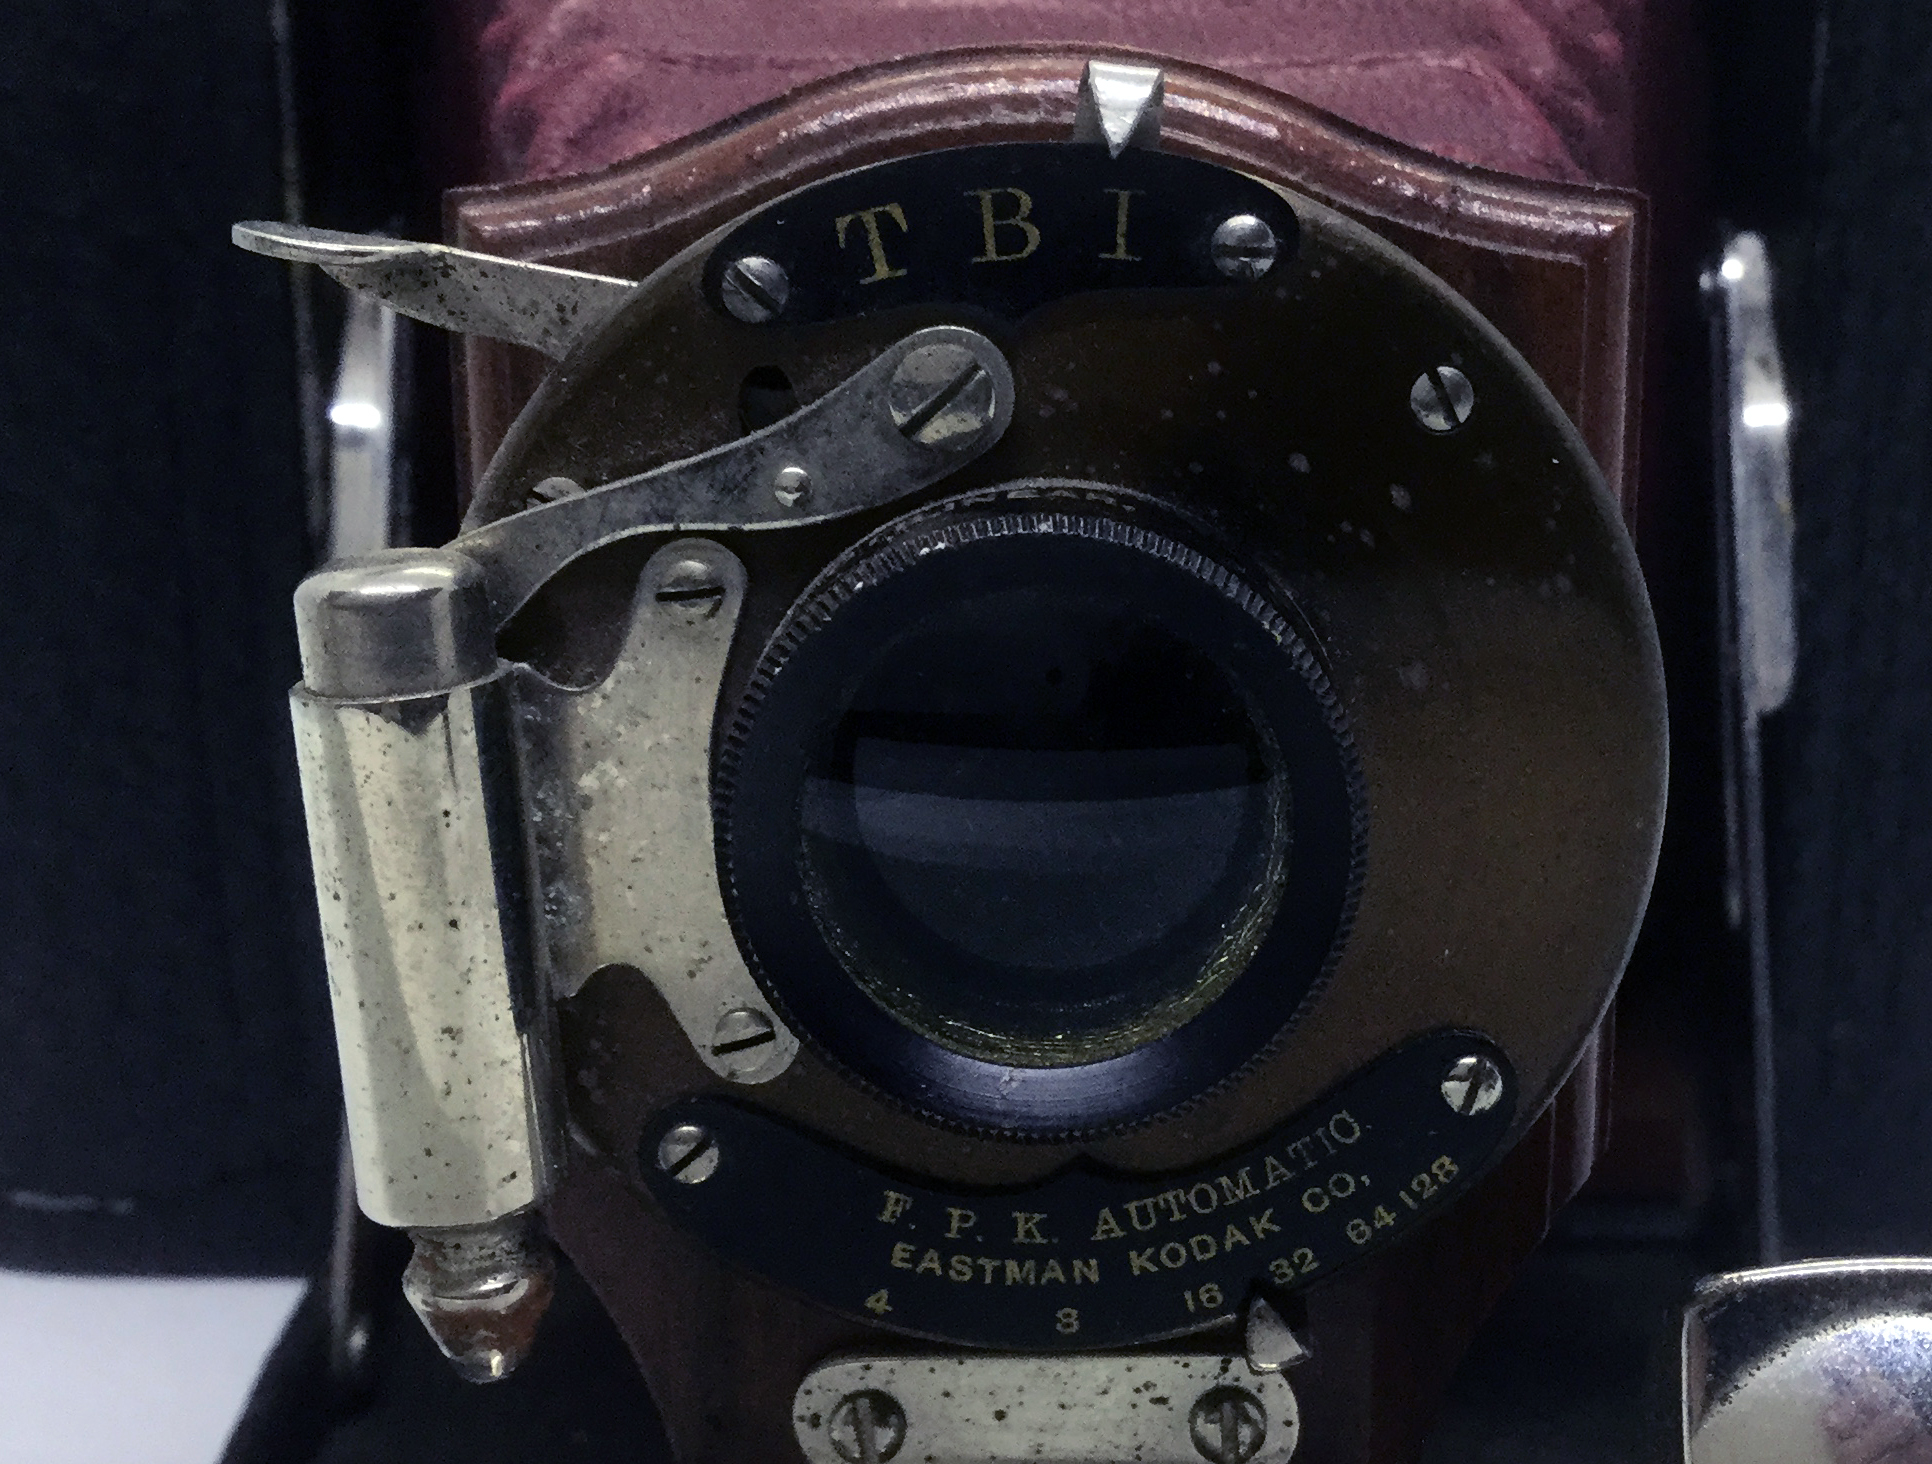
The No. 2 FPK was designed to take twelve 3.5 by 3.5 inch square exposures and used 101 film. Which is the very first kind of rollfilm produced – for the No. 2 bullet camera, introduced in 1895. The “No. 2” in the camera designation gives away the film size, 101. Learn more about early film designations here.
So the challenge of making this camera work properly was to get as close as possible to the 101 film standard. Even 11 decades later, the shutter on this particular camera works like a charm, the leather is intact, and the aperture opens and closes as it should. No fungus on the lens, so everything should theoretically work out fine.
It’s the 101 film, however, that would turn out to be the headache. To make one of these work, you first need a second spool – one to hold the film, and another to take up the film as it is exposed. There are other solutions involving 3D printers, but I don’t have the patience to deal with those. But 101 film spools are difficult to search for. It could be that there simply aren’t many out there (the film was discontinued in 1956) or it could be that the 101 moniker is overused – SRT-101, for example. But no spools were turning up.
By sheer coincidence, however, I learned that 122 film spools, which hold slightly smaller film (3.25 inches) appear to fit in this camera. The spool itself appears to be just a hair larger than the 101 – I used it as the takeup spool and it was difficult to turn but doable. As a bonus, it came with backing paper.
I had planned to use 120 film even though it’s only 2.4 inches wide, but the fact that you end up losing more than an inch of image, and I had a backing paper on hand made me wonder whether a better solution might be an option.
 Despite a difference of 1/4 inch in film width, it seems that 101 and 122 film spools are actually very similar in length.
I realized I have a box of 4×5 Bergger Pancro 400 in the freezer. So in theory I could cut pieces of 4×5 inch sheet film to size and if I could find a way to attach them to the backing paper, I’d be able to take images the full 3.5 by 3.5 inches. So I made myself a cardboard template (in retrospect a hard plastic would have been better) 3.5 by 3.5 inches. I knew I’d have to work in the dark, so I creased the backing paper every 3.6 to 3.7 inches. The plan was to use masking tape to attach the sheet film pieces to the backing paper, leaving a space for the tape to stick.
The other issue was knowing how far to turn the film advance knob to avoid overlapping exposures and maximize the length of the backing paper. The round window that allows you to see the numbers on the back of the paper is in the middle of the camera back. So I used a sharpie to mark the exposure numbers in the middle of the backing paper, exactly between each set of creases.
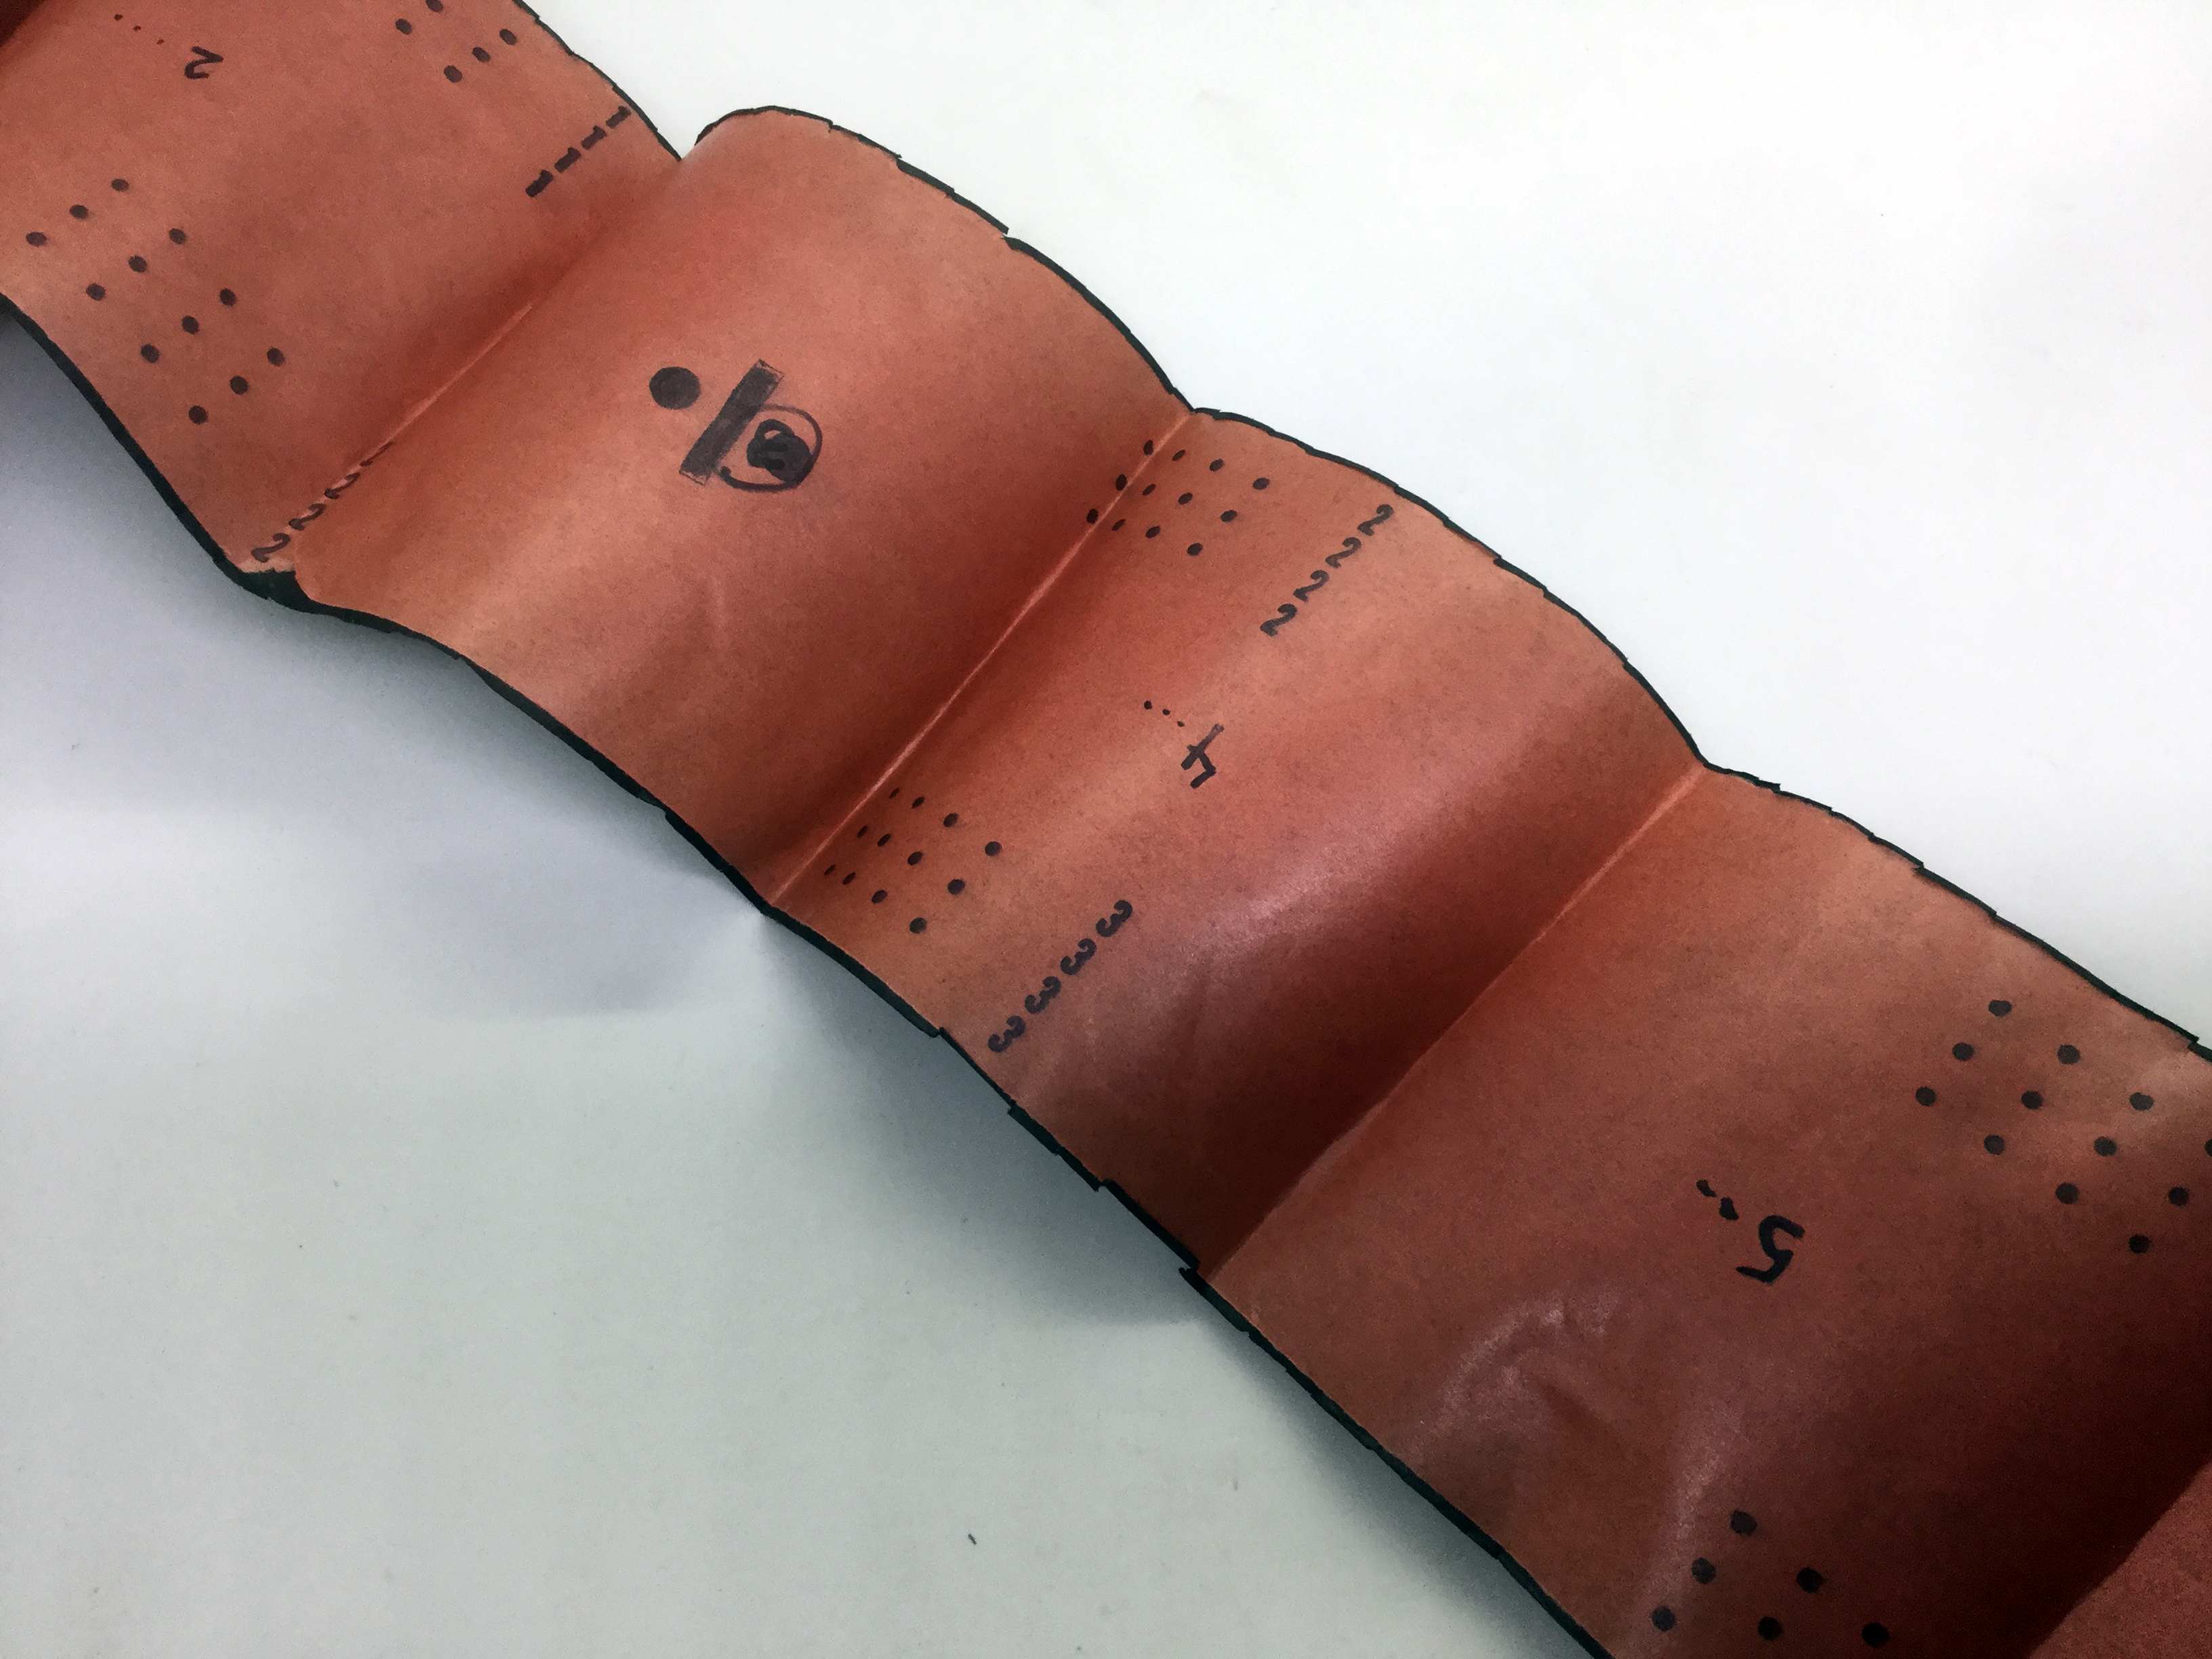
Next, it was time to prepare the film. I sat on the floor of my pitch black bathroom with the box of Pancro, a roll of masking tape, scissors, my 3.5 by 3.5 template, the film spool and backing paper, with the creases indicating where the film should be taped. In complete darkness, I cut the sheet film to size, ensuring I kept track which way the emulsion was facing. Then I taped a sheet between each set of creases, ensuring as much as I could in the dark that I had enough masking tape to hold the film in place without covering too much of the film that would be exposed.
This all sounds great, but when you’re sitting in the dark doing this, and the spool and backing paper want to return to their rolled-up state, but the sheet film is thicker and less flexible than you expected, meaning it resists being rolled up, and you only have two hands, the process can be challenging and nerve-wracking. Add to the equation sweath fingers, starting from about 20 minutes in and gradually increasing as time goes on.
Eventually I managed to attach 10 pieces of sheet film to the backing paper, and painstakingly rolled it as tightly as I could to try and fit it in the camera. I think 12 would have made the roll too thick, honestly. And I walked home from work one day and snapped a bunch of photos in the late afternoon light.
When it came time to develop the film, I had to first separate the sheets from the backing paper, and then develop 10 individual sheets of Pancro film – which can be challenging for me as I don’t have any equipment for sheet film. Some of the corners of individual sheets had bent, but by and large the film was correctly placed and aligned, and when I saw the processed film, it was clear I had usable images to work with.
The final piece to the puzzle was scanning the film. My scanner maxes out at around 70mm, so I had to make two scans of each sheet, and stitch them together with photoshop. But in the end I had 10 somewhat decent exposures. Not as nice as others I’ve seen online for a similar camera by any stretch, but they were decent. Here are a few samples, and then I’ll offer my verdict.
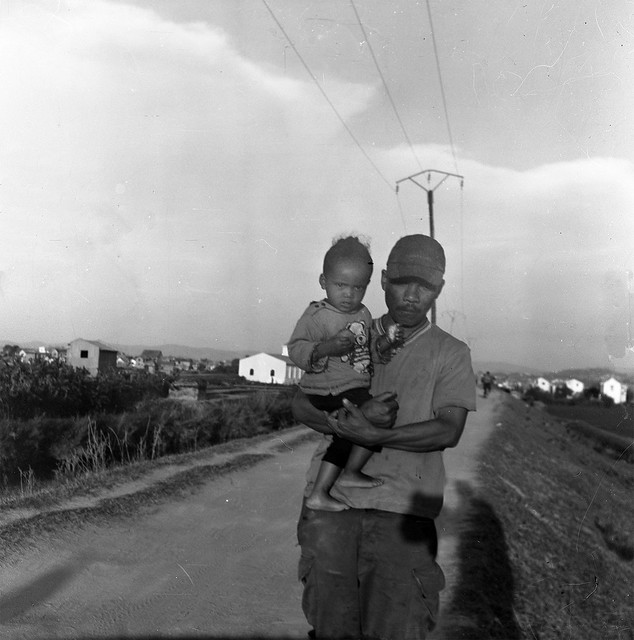
In Madagascar, I’ve noticed a special closeness between fathers and young children, and I’ve wanted to do a series. Every time I mention it to a Malagasy person they seem surprised at my observation. As this man was when I asked him if I could snap a photo.
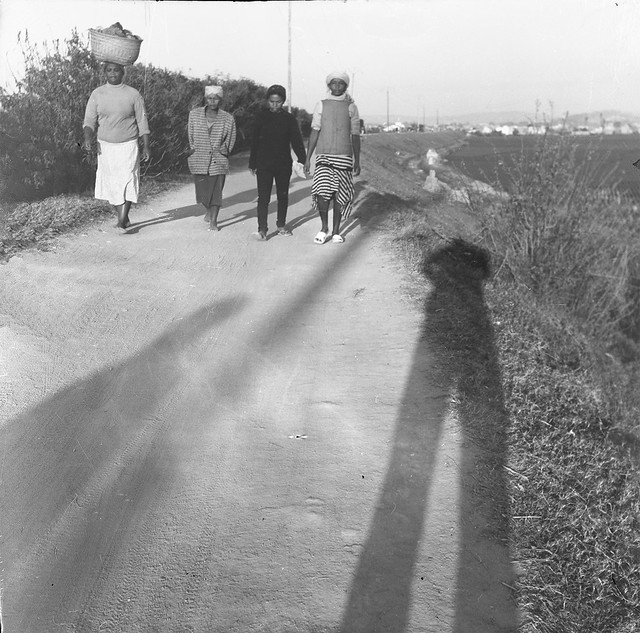 I snapped this shot at waist level, and I don’t think these ladies realized what was going on until I passed them and they wondered what strange device I was holding. Clearly a novice photographer, I can’t bother to ensure my own shadow doesn’t spoil the picture. This is not the only shot I did this in.
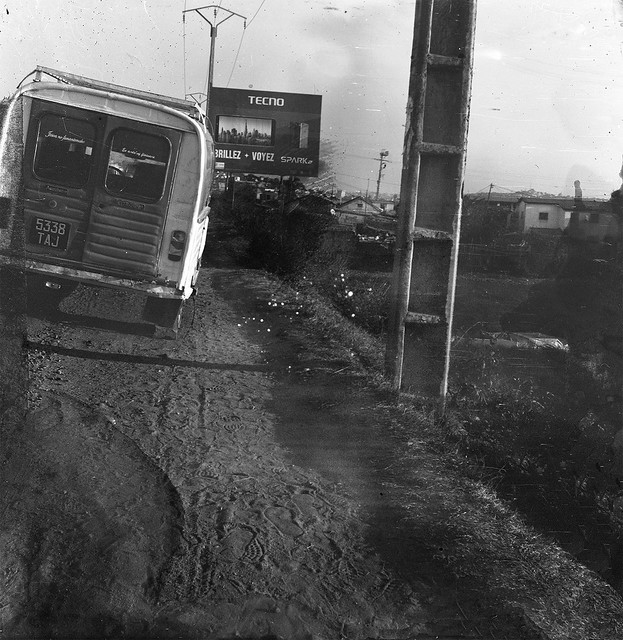 The streets of Madagascar are home to some of the oldest cars in the world.
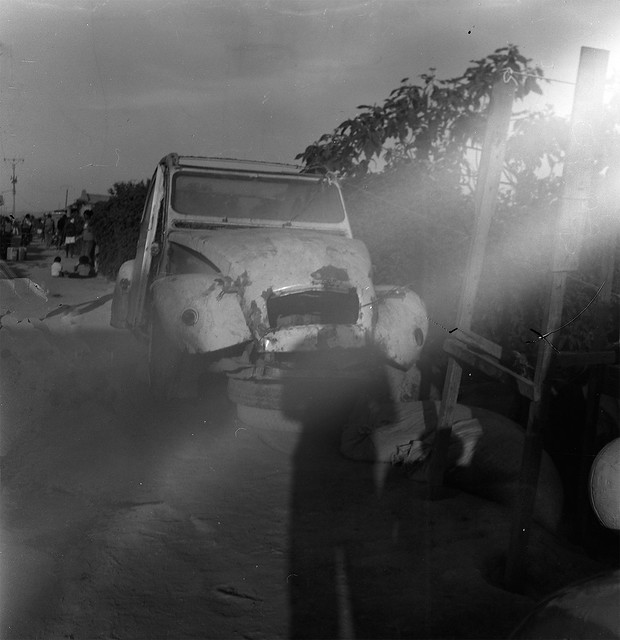 This car has seen better days. Again, my shadow spoils it all.
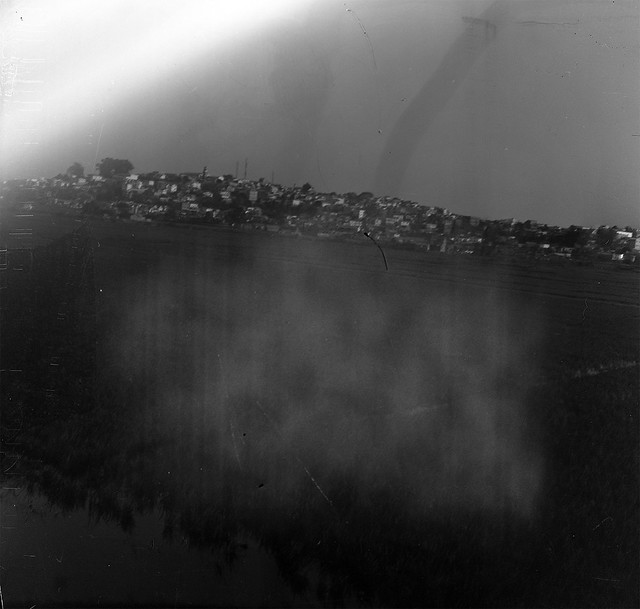
Verdict: Clearly, many of the problems in these photos are due to the method I chose to process them. Sometimes when you’re doing a lot of sheet film at once, the sharp corners (the Bergger Pancro is thick and its corners don’t give way) will scratch other photos. The fact that two of them had bent corners didn’t help the issue. But this film is not cheap, and it’s supposed to be pretty good quality. On some of the photos there is a bit of damage along the edges where I used photoshop to “repair” where the masking tape had been, but I’m stumped by the fogging in some of the darker photos – especially the one below. The pattern is a bit mottled, and so I wonder if, despite not having any holes in the bellows, the corners are simply no longer light-tight? I could test this by covering the bellows with black plastic, but preparing the roll was such a pain, I’m not sure when I’ll work up the motivation to do so… So I’m hoping instead someone else has run into this and will advice accordingly.
 The rest of the photos for this camera can be found here.
