-
Recent Posts
- Gulshan 3: Weekend Escapes to Thailand
- Another Year, Another Itdyadi
- Our Truly Amazing TV Debut: Behind the Scenes
- Holi in Bangladesh Part 2: the Ruined Roll
- Holi in Bangladesh
- Hashing Out Old Dhaka
- The Blog is Back: First Impressions of Dhaka, Bangladesh
- A Few Words About My Father
- The Sky is NOT Always Blue in California
- “Artisans” documentary series – final (?) episode
Category Archives: Photography
Holi in Bangladesh Part 2: the Ruined Roll
A bit of clicking around this site will reveal I’m a film photographer. And when I went to photograph the Holi celebration for my previous post, I took with me three rolls of film. Only two turned out as intended. … Continue reading
Posted in Bangladesh, film processing
Tagged Amber, D400, film, happy accident, holi, lomo purple
Leave a comment
Onward to Mahajanga, Madagascar
In my previous post I talked about our meticulously planned trip to see all four islands of the Comoros archipelago, which was so rudely interrupted by political violence…and so we shifted to Mahajanga, on the west coast of Madagascar. I’ve … Continue reading
Memories of Favorite Places: Ile aux Nattes, Madagascar
Off the eastern coast of the island of Madagascar stretches a 57-kilometer long by 5 kilometers wide island, covered mostly in green and dotted with thatched-roof villages. Ile Sainte-Marie (Saint Marie’s Island), or Nosy Boraha, as it is known in … Continue reading
Posted in Aerial photography/videography, Madagascar
Tagged Ile Aux Nattes, infrared, Madagascar
2 Comments
Introducing Kids in Madagascar to Photography: Results (3)
This is the third in series of posts in which I write about introducing kids to photography, using point-and-shoot film cameras from the 1980s and 90s, at the youth center, Le Cameleon, in Antananarivo, Madagascar. You can find previous posts in … Continue reading
Introducing Kids in Madagascar to Photography: Results (2)
This is one of a short series of posts in which I write about introducing kids to photography, using point-and-shoot film cameras from the 1980s and 90s, at the youth center, Le Cameleon, in Antananarivo, Madagascar. You can find previous posts … Continue reading
Introducing Kids in Madagascar to Photography: Results (1)
I wrote last time about the youth center, Le Cameleon, we crowdfunded and built in Antananarivo, Madagascar, and the project we organized to introduce a half dozen interested kids to photography, using point-and-shoot film cameras from the 1980s and 90s. … Continue reading
Sharing our Passion: Kids in Madagascar Get a First Taste of Photography
A few years ago, I joined a couple of other folks with a passion for photography and an interest in doing something for the local community in Antananarivo, Madagascar. We collaborated to successfully crowdfund a small youth center that would … Continue reading
Visit to Isalo National Park, Madagascar
Shortly before leaving Madagascar after having lived there for more than three years, I finally made it to Isalo National Park, which is one of the premier tourist destinations in country, and one I would have regretted missing out on. … Continue reading
Testing Kentmere 400 Film
I’m not sure why I’ve never really heard of this film – most online discussion refers to it as a “cheaper” film produced by Ilford Photo, but I was quite impressed. I found the tones and the grain very pleasant, … Continue reading
Locust Swarm in Madagascar
Shortly after arriving in Madagascar a few years ago, we watched the BBC’s Planet Earth II episode in which a film crew found it amazingly difficult to track down a swarm containing more than a billion of the tiny, destructive … Continue reading
Posted in Aerial photography/videography, Madagascar, Wildlife and Nature
Tagged aerial, locusts, video
Leave a comment
Ektachrome Returns!
I followed with interest the hype surrounding the re-release by Kodak Alaris of Ektachrome 100 slide film, announced in early 2017, after having been completely phased out by 2013. Honestly, initially I wasn’t that interested, but as time wore on … Continue reading
My Experience with Kodak AEROCHROME
A few months ago, I’d never heard of “Aerochrome” film. What is aerochrome? According to Kodak, “KODAK AEROCHROME III Infrared Film 1443 is an infrared-sensitive, false-color reversal film intended for various aerial photographic applications where infrared discriminations may yield practical … Continue reading
Posted in Film tests, Photography
Tagged Aerochrome, experimental, film, infrared, Kodak, Madagascar, Rolleiflex
1 Comment
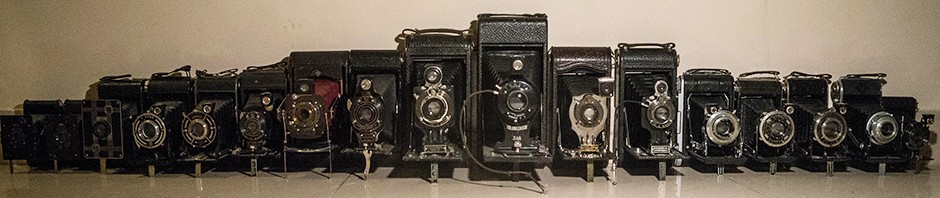
Making a Camera Work: The No. 2 Folding Pocket Kodak Model C or Maybe D…
Among the growing group of people who collect and operate vintage film cameras, there are two types of people: those who quickly figure out a way to make an old camera work again, and those who obsess way too long … Continue reading
Posted in film processing, Vintage cameras
Tagged 101 film, 122 film, antique, Bergger Pancro, Folding Pocket Kodak, No. 2, review, test, vintage
Leave a comment
Results, #ShittyCameraChallenge, October Edition
Back in June, I was excited to post my results in the first Shitty Camera Challenge. At the time, the results were completely appropriate for the camera I used at the time, and I still lie awake at night wondering … Continue reading
Posted in Photo Contest
Tagged #ShittyCameraChallenge, @ShittyCamera, camera, cheap, contest, inexpensive, plastic, Shitty
3 Comments
Whale Watching in Madagascar
Every June or July, thousands of humpback whales migrate thousands of miles north from Antarctica to have their young just off the coast of Madagascar. And finally we made it up in time to see them (September is best!) Not … Continue reading
Posted in Aerial photography/videography, Madagascar, Wildlife and Nature
Tagged aerial, drone, humpback, Ile Ste Marie, Madagascar, mammal, Nosy Boraha, video
4 Comments
Twelve Months, Twelve Cameras, Twelve Decades…and One Film. #ATG365
In August 2017, the hosts of podcast Against the Grain discussed photographers’ tendency to immediately look at photos they’ve shot (chimping) and how film photography slows the process down, resulting in an increased emphasis on capturing the photo, without constantly worrying about … Continue reading
Posted in film processing, Photography, general, Vintage cameras
Tagged 365, 400, Against the Grain, antique, chimping, decades, film photography, Kodak, tri-x, vintage cameras
Leave a comment
My Entries in the #ShittyCameraChallenge
I laughed when I saw the announcement on Twitter: As I am known to use shitty cameras to make shitty pictures, this seemed perfect for me. I decided this would be a great opportunity to try out this camera I … Continue reading
Posted in Contests, Other, Madagascar, Photo Contest, Vintage cameras
Tagged #ShittyCameraChallenge, @ShittyChallenge, camera, plastic, Shitty, vintage
3 Comments
Testing Silberra’s New Film
Tell most people there’s a new kind of photo film and they’ll think you’re crazy. But there have been a number of new film types over the last year or two – some reboots by companies like Kodak, new film … Continue reading
Posted in film processing, Film tests, Photography, general
Tagged black and white, film, Indiegogo, new film, Pan200, Photography, Russia, silberra
5 Comments
Mauritius: Like a Slice of Southern India…and More!
We love Madagascar but from time to time we need a break – a change in scenery, a change in pace. Mauritius is great for that. It’s green, with a pleasant climate, and…nice. Mauritius has come a long way in … Continue reading
Posted in Aerial photography/videography, Other Places
Tagged aerial, drone, Ganga Talao, Grand Bassin, Hindu, jungle, Mauritius, Pieter Both, Shiva, statues, temple, tourism, Vishnu
Leave a comment
Favorite Film, Favorite Camera
I finally got around to trying something a photographer friend suggested a couple of years ago. At the time, I was new to film photography and not trying anything too fancy, beyond simply getting the 50, 60, 70-year-old cameras I … Continue reading
Posted in film processing, Madagascar, Photography
Tagged 400, Antananarivo, black and white, film photography, grain, Kodak, Madagascar, push processing, Reunion, tri-x
3 Comments
Kodak T-Max P3200: My First Roll
A notification from 35mmc today with Hamish Gill’s review of Kodak’s re-released P3200 reminded me that I, too, recently shot my first roll of P3200 – I just hadn’t gotten around to sharing my results. I’m a little bit late … Continue reading
Posted in film processing, Other Places, Photography, general, Wildlife and Nature
Tagged Addo, Alaris, elephant, film photography, Kodak, P3200, push development, South Africa, T-Max, zebra
Leave a comment
Droning with the Dolphins
They were so majestic. About a half-mile out, I would swim directly overhead a pod of dolphins swimming directly beneath me, maybe 7 or 8 meters down. They’d swim slowly, all most like they were “letting” me keep up. Then … Continue reading
Posted in Aerial photography/videography, Other Places, Wildlife and Nature
Tagged dolphins, drone, GoPro, Indian, Le Morne, Mauritius, ocean
Leave a comment
More Ilford Delta 3200
I posted awhile back about my first experience with Ilford Delta 3200 film – or any high-ISO film, for that matter. I was initially disappointed, but later the results grew on me. I had no idea just how much grain … Continue reading
Posted in Photography, general
Tagged 3200, black and white, cemetery, contrast, Delta, high-speed, Ilford, ISO, Reunion
Leave a comment
Antananarivo’s New Road
Last year in November, Madagascar’s capital Antananarivo unveiled a new road, from the northwest of town to the airport. Within three days, workers were filling potholes, and within a week, the road was closed. In the year since, there have … Continue reading
Posted in Aerial photography/videography, Madagascar
Tagged airport road, Antananarivo, DJI, drone, farming, Madagascar, Mavic, rice, road, straw
1 Comment
“Pushing” Film: Ilford Delta 3200
cows and bananas and canals…all on my run route between home and the office! I’m not a dumb person, but I’ll admit I’ve always managed to confuse myself when reading or speaking about “pushing” or “pulling” film. Now that I’ve … Continue reading
Posted in Photography
Tagged 3200, black and white, Delta, experimental, film, Ilford, noise, pulling, pushing
3 Comments